
DVD SHELVES – FINISHED
Finished!
I should have done this post first! although I don’t think that it works that way 🙁
![]() Well, you’ve finished your DVD shelves and you go to move them and remember that they are made of 3 very large sheets of 18mm MDF. crap. (yes, that is the technical term for this situation)
Well, you’ve finished your DVD shelves and you go to move them and remember that they are made of 3 very large sheets of 18mm MDF. crap. (yes, that is the technical term for this situation)
Now you could call up a couple of your mates and tell them that you have free beer, but that won’t make the shelves any lighter – But it will make your fridge lighter!.
TIP: Get a Skateboard from your local cheap stuff shop. I got mine from KMart and it cost about AUD$12… cheapest trolley… EVER!. Your average skateboard turns up at the ends, so you will need to cut off the ends just before they start to turn up (obviously leaving the wheel areas in tact!).
Put a towel on top and there you have it… Easiest way to move your big ass shelves!
Well, above you can see an photo of the empty shelves, in place against the wall (yes, they actually exist! – not a render!). Below you can see what they look like finished. Finally a place to put all of my DVD’s and BlueRays.
Note how you can see the wall through the shelves… this idea definitely worked for me. The textured wall and the black shelves contrast well to make a striking feature wall in my lounge. But if you don’t like it, or you actually WANTED to hide the wall, then simply use 3mm MDF over the whole back of the shelves!
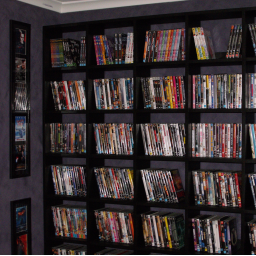
You can also see in the photo how the picture frames work well with the shelving and keep the theme going… and yes… There was a long debate over which movie posters would make the cut and get to the wall!
Happy Movie Watching!